webVision history recording
Guide on how you can set points to history recording and create history groups in Fidelix webVision controlroom software
The fastest way to set points to have history recording and create a history group is by going to the graphic where the points are and clicking on the desired point.

Then from the menu that opens click "Trend graph"

This will open a short trend graph, showing the recent values of the selected point.

You can add more points to the same graph by clicking on other points from the graphic and selecting "Trend graph" from the menu that opens, without closing the trend graph.
Or you can add points to the graph by writing the point ID of the desired point to the field next to the "Add point" button and then pressing the "Add point" button.
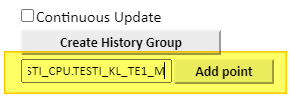
Once you have added all desired points to the graph click on the "Create History Group" button.

This will add the selected points to history recording and create a history group for the points.
In the view that opens you can then give the history group a more descriptive name by writing the name in the field indicated below and then clicking on "Rename" button
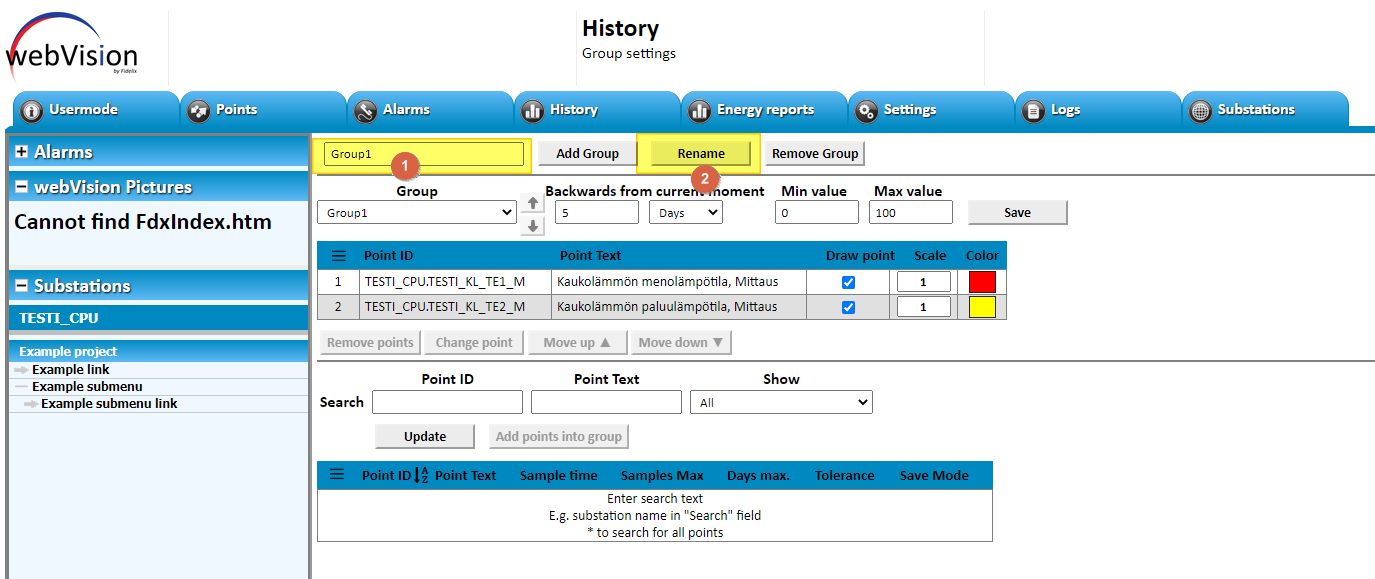
After pressing rename the new name will show on the list of groups.

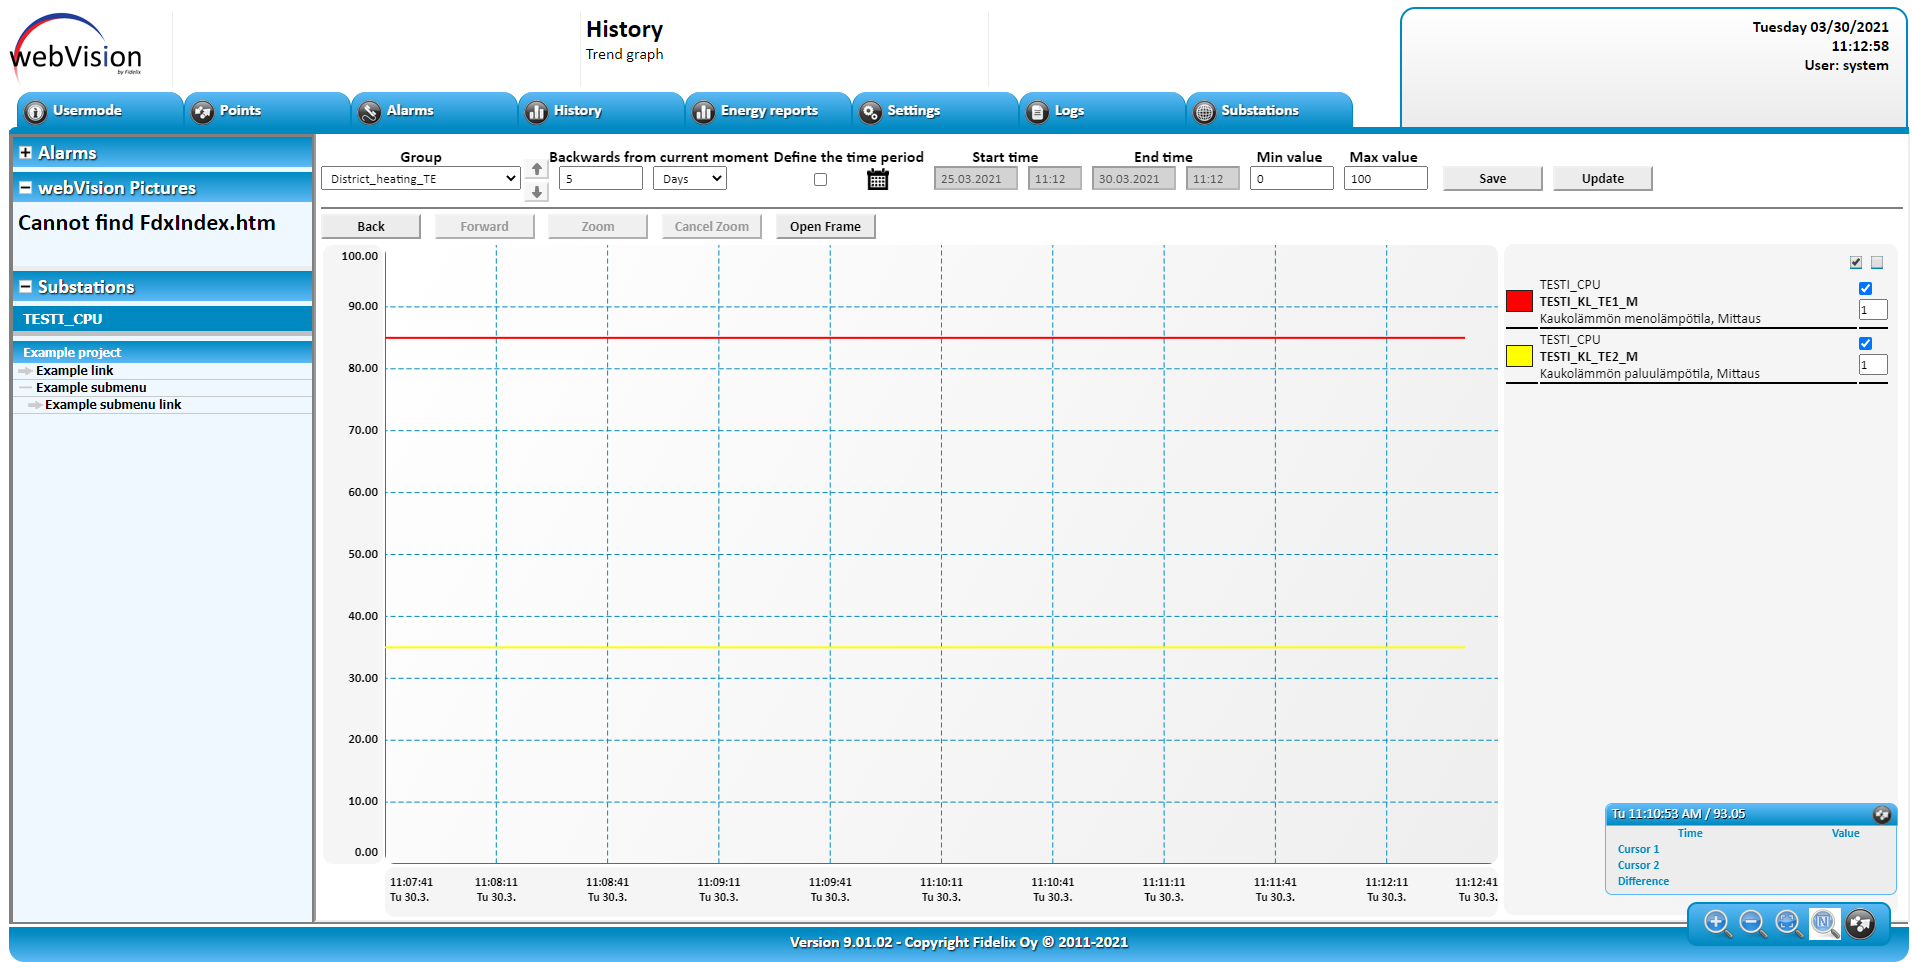
Now if you go "History" menu and select "Graph" option you can view the data of the history group.
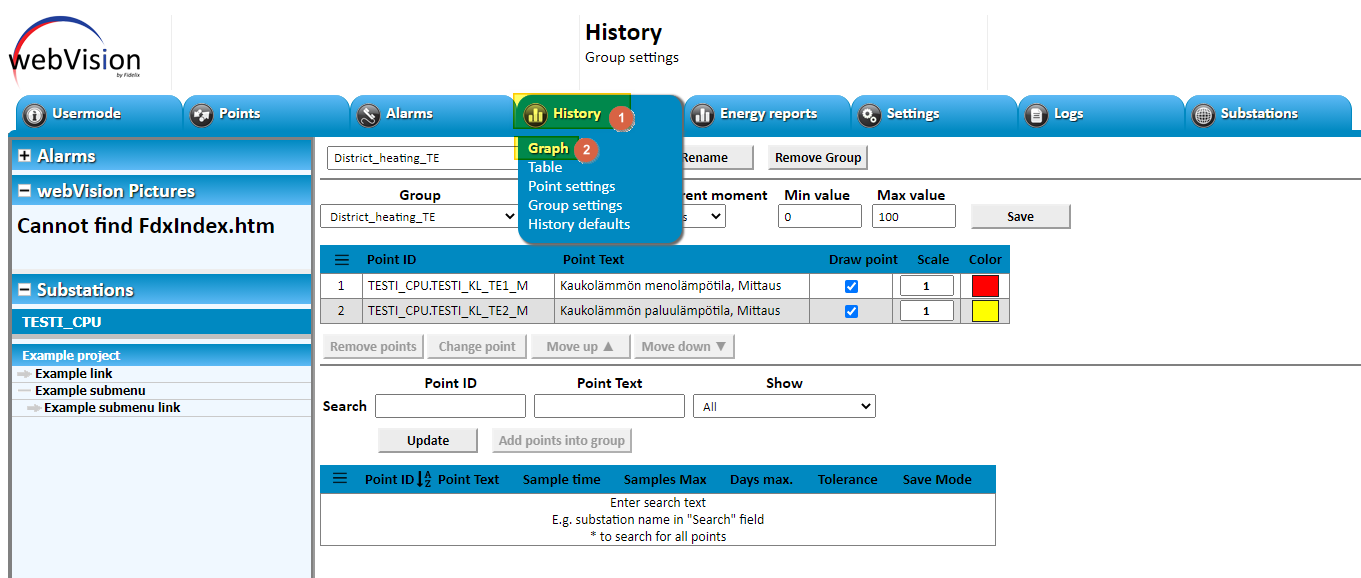
You can also change settings for each point on how data from them is saved for the history recording by going to "History" menu and selecting "Point settings"

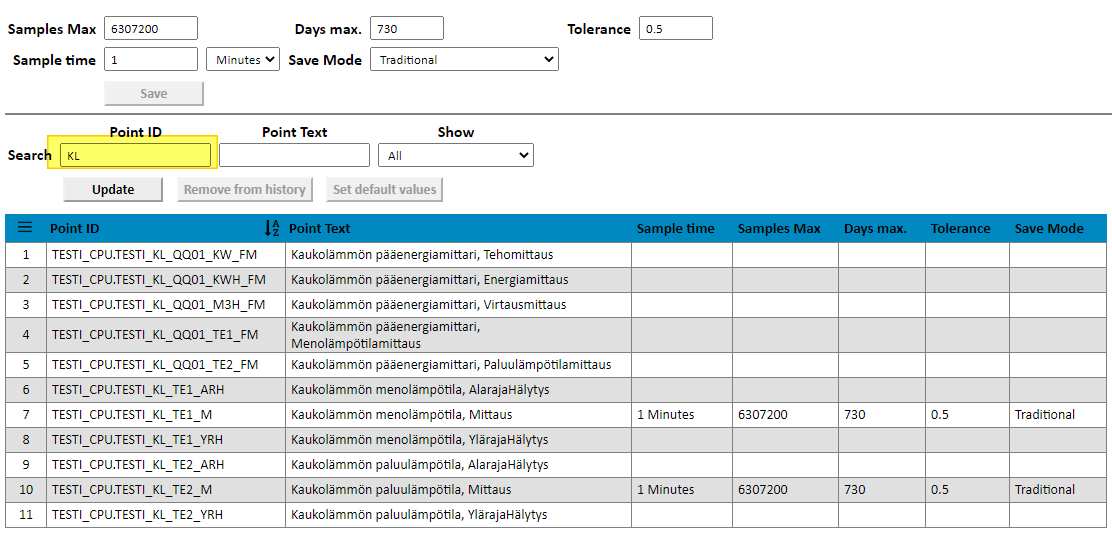
You will need to locate the point you want to make changes to by either writing a * in the search field and pressing the "Update" button, which will show all points in the list of points, or you can type in a section of the point ID to make locating the correct point easier.
All points:

Or to make it easier:
Now click on the point you want to edit and you can change the settings in the field at the top of the page.
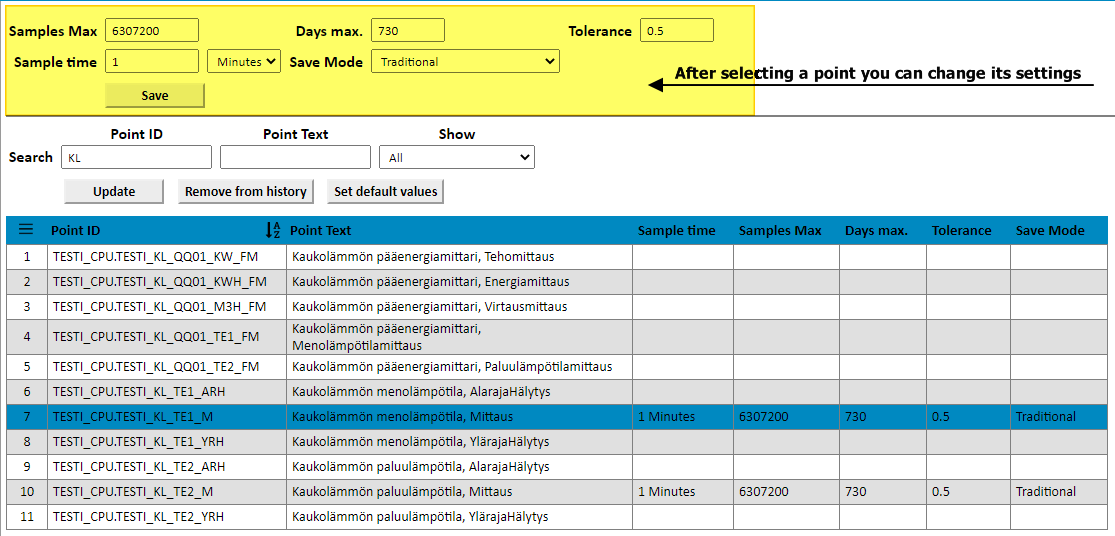
Usually the default values are good, but if for example a fast process is monitored then lowering the sample time might be required to get useful data.
![]() If you need to set limit values of a measurement point to history recording this can not be done by clicking on the point from a graphic but instead this needs to be done in the "Point settings" page.
If you need to set limit values of a measurement point to history recording this can not be done by clicking on the point from a graphic but instead this needs to be done in the "Point settings" page.
Locate the point that you want to have the limit values recorded from the point menu.

Now click on the limitvalue you want to record and then click on "set default values" button followed by the "Save" button.
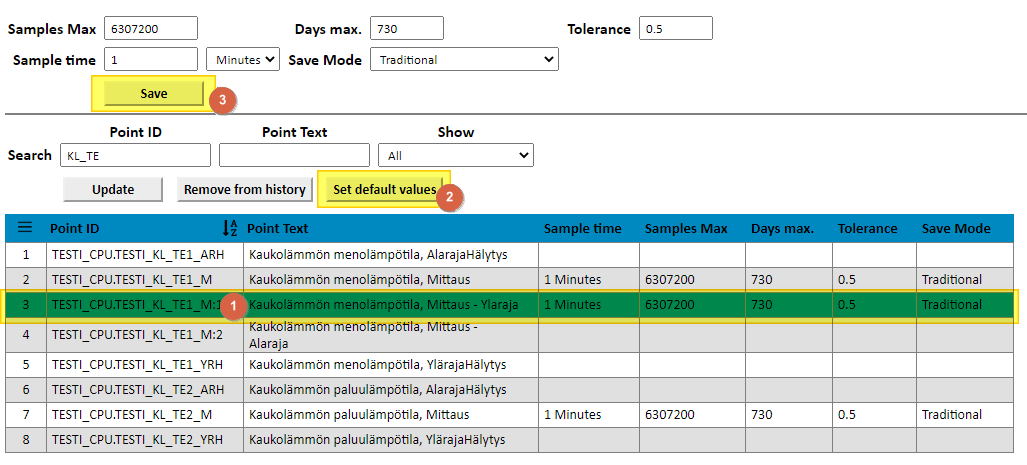
Repeat for all the limits you want to record.
Then to add these limits to a history group, go to "History" menu and to the page "Group settings".
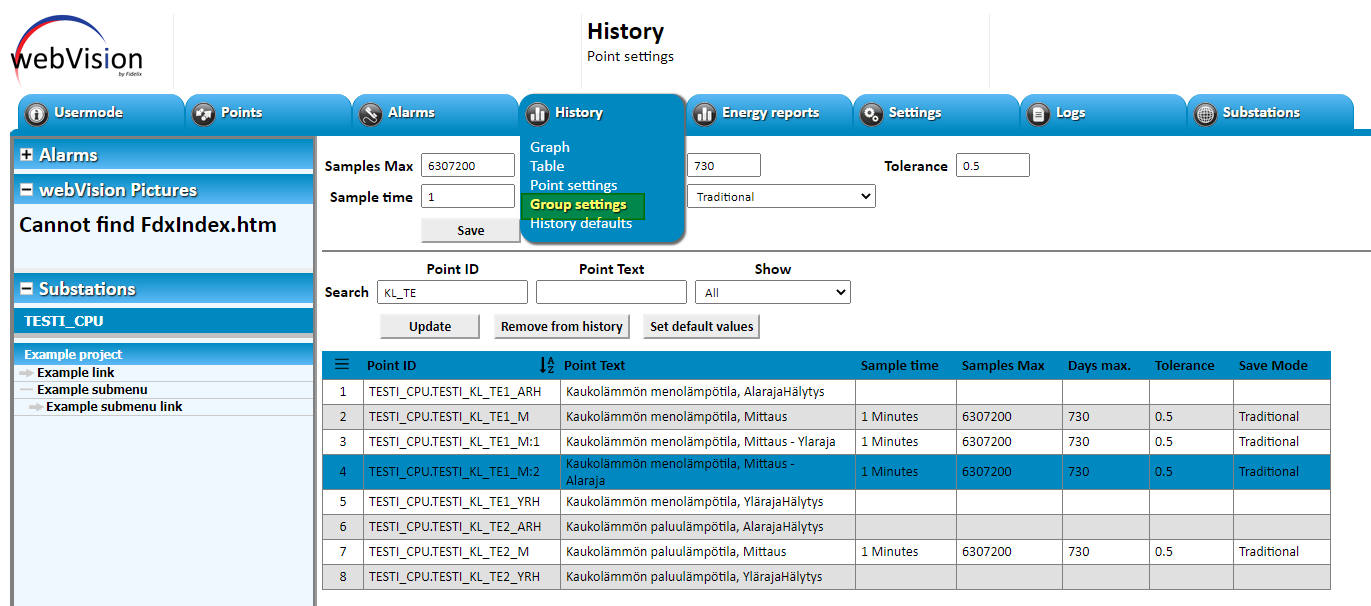
Select from the list of groups the one you want to make modifications to.

Search for the points you want to add to the group.
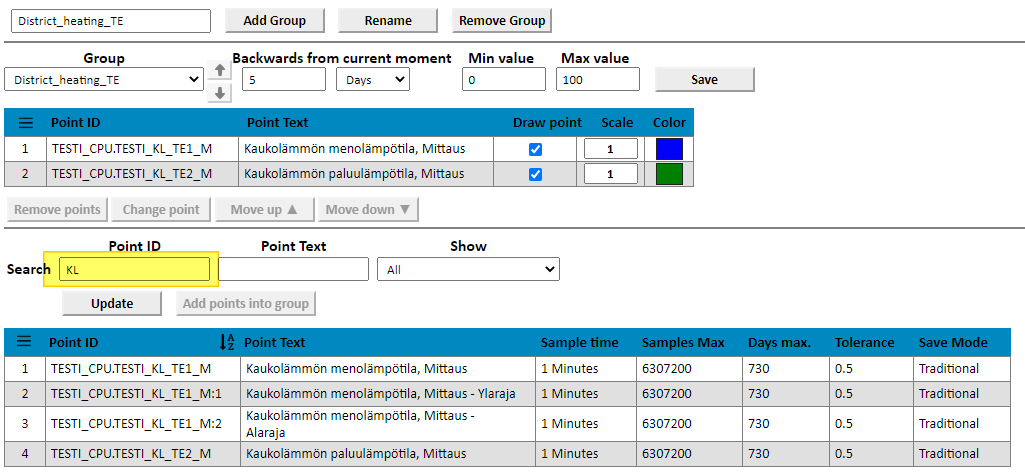
Then click on the point you want to add to the group. (You can use CTRL + Click to select multiple points to add simultaneously) And then click on "Add points into group" button.

Now the limit values can be seen in the graph of the history group.

![Logo_Fidelix-1.png]](https://support.fidelix.com/hs-fs/hubfs/Logo_Fidelix-1.png?height=50&name=Logo_Fidelix-1.png)